Fitting kitchen units goes in this order: first find the highest point of the floor, then mark a level reference line on the wall, then hang the wall units (those go up before the base units, because you still have room to work), then set the base units on their legs, then join them together, then the worktop, and only right at the end do you adjust the doors and clip on the plinths. The standard sizes: a base unit carcass is 72 centimetres high, and with legs of 10 to 15 centimetres and a worktop of 2 to 4 centimetres you land on a working height of roughly 90 to 92 centimetres. The bottom of the wall units usually sits 50 to 60 centimetres above the worktop.
The mistake most people make is not in the hanging, it is in the first ten minutes: they do not measure the floor. A floor that drops 1.5 centimetres across the length of the kitchen is completely normal. Start in the wrong corner and your whole kitchen runs out of true, and you only spot it once the worktop is on.
Everything is below: the standard sizes you actually need, how to work out your ideal working height (it is usually not 90 centimetres), how to fix units to every wall type without them pulling out, the full step-by-step, where the water and electrical connection points belong, how to get the apertures for built-in appliances spot on, and the eight mistakes that give you a wonky kitchen.
The standard sizes you need
Almost every kitchen follows the same grid. Handy, because it means you can mix brands and components.
Base units
| Dimension | Value |
|---|---|
| Carcass height | 72 cm |
| Leg height (plinth) | 10 to 15 cm |
| Worktop thickness | 2 to 4 cm |
| Total working height | roughly 90 to 92 cm |
| Carcass depth | 56 to 58 cm |
| Depth including worktop and door | 60 to 65 cm |
| Widths | 30, 40, 45, 50, 60, 80, 90, 100 and 120 cm |
Wall units
| Dimension | Value |
|---|---|
| Depth | 30 to 35 cm |
| Heights | 40, 60, 70 and 90 cm |
| Widths | 30 to 100 cm, usually in 15 cm steps |
| Distance above the worktop | 50 to 60 cm |
Tall units
Tall units are usually 200, 214 or 220 centimetres, so they finish flush with a wall unit at standard height. Depth the same as the base units.
Work out your working height before you screw anything down
Ninety centimetres is the standard, but the standard is a compromise for people around 1.70 metres tall. If you are taller than that, you will spend years hunched over the chopping board.
The rule of thumb: measure from the floor to your elbow and take off 10 to 15 centimetres. That is your ideal worktop height. Source: Dovy Keukens
| Height | Comfortable working height |
|---|---|
| up to about 1.70 m | 85 to 90 cm |
| 1.70 to 1.90 m | 90 to 95 cm |
| over 1.90 m | 95 to 100 cm |
Are you and your partner very different heights? Then there are two practical answers: pick a height in the middle and put a small step stool out for the shorter one, or build a kitchen with two worktop heights (the hob section 5 centimetres lower than the prep section, for example). That second option looks smart and works brilliantly.
Your room to play with: the adjustable legs on standard units usually give you 10 to 15 centimetres. If you want to go above 95 centimetres, look at 15 or 20 centimetre legs or a thicker worktop.
Preparation: what to do before the units arrive
Step 1: measure the floor
Lay a long spirit level (2 metres minimum) or a laser on the floor and find the highest point along the wall the units are going against. Mark it with a cross.
You work everything out from that highest point. Why? Because you can wind the legs on the other units up, but you cannot press them into the floor.
Measure the difference as well. Does your floor drop more than 2 centimetres across the length of the kitchen? Then think about levelling the floor first, because otherwise your plinth ends up a centimetre wider at one end than the other.
Step 2: measure the walls
- Square: measure the diagonals in the corner where two runs of units meet. If it does not add up, you know now that you need a filler.
- Flatness: hold the spirit level vertically against the wall. Does it bow? Then your wall unit will end up tipping forward.
- Ceiling height: in several places. Ceilings run out of level too.
Write it all down. A simple sketch with all the sizes on it is the foundation of every straight kitchen.
Step 3: mark the reference lines on the wall
This is the most important part of the whole job and it takes half an hour.
Working from your highest floor point, draw three horizontal lines on the wall, all three dead level:
- The top of the base units (87 centimetres, for example, if your worktop is going to be 3 centimetres and you want to land on 90).
- The bottom of the wall units (90 + 55 = 145 centimetres, for example).
- The line of the hanging rail for the wall units (bottom of the wall unit plus the unit height, minus the figure the manufacturer gives you).
Use a cross-line laser if you can borrow or hire one. A day’s hire costs a few euros and it saves you an hour of measuring and a lot of faffing. Otherwise: a long spirit level and a pencil, and check everything twice.
Mark your vertical lines too, so where each unit starts and stops. Then you can see straight away whether you need a filler at the end, and you want to know that before you start drilling.
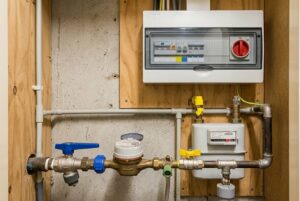
Step 4: pipework and connections
Is the old kitchen out? Then this is the moment for water, waste and electrics. Where they belong:
| Connection | Usual position |
|---|---|
| Isolating valves for water | 30 to 50 cm above the floor, inside the sink unit |
| Waste trap | 40 to 50 cm above the floor |
| Sockets above the worktop | 15 to 20 cm above the worktop |
| Extractor hood connection point | inside the wall unit or behind the hood |
| Cooker connection point or high-power supply for the hob | in the unit next to the hob, reachable |
| Socket for dishwasher / oven | in the neighbouring unit, never behind it |
That last rule is worth its weight in gold. Never put a socket directly behind a built-in appliance, because then the appliance will not go into the aperture or it stands a centimetre proud. Put it in the unit next door and drill a cable pass-through.
Watch out for pipes and cables when you drill. Use a detector and stick to the standard installation zones (vertically above and below switches and boxes, horizontally along the ceiling and floor). Drill into a water pipe behind your brand new units and you get to take the whole kitchen apart again.
Units on the wall: which fixing for which wall?
A full wall unit with plates and pans in it soon weighs 40 to 60 kilos. This is not the place to improvise.
| Wall type | Fixing |
|---|---|
| Concrete | concrete screw or 8 mm nylon plug, screw 60 mm minimum |
| Brickwork | 8 or 10 mm nylon plug, screw 60 mm minimum |
| Aerated concrete block | dedicated aerated concrete plug or plastic spiral plug, at least 4 points per unit |
| Gypsum blocks | long plug or a through fixing, spread the load |
| Plasterboard / metal stud | cavity fixings or metal plasterboard anchors, and ideally timber noggins behind |
| Timber stud wall | screw straight into the stud |
A common rule of thumb is that your screw needs at least 40 millimetres of grip in the load-bearing material (in brickwork and concrete make it 50 to 60 millimetres, measured past the plaster). Source: Leenman Bouw
Aerated concrete and plasterboard deserve extra attention. Aerated concrete can carry a decent weight with the right plugs and at least four fixing points per unit, but keep a generous safety margin on the stated figure per plug. Source: Boorwijzer
With a plasterboard or metal stud wall, the best answer is timber backing. If the wall is still open, screw an 18 millimetre plywood board between the studs at the height of the hanging rail. If you cannot get to it any more, use heavy-duty cavity fixings (metal spring toggles) and find the studs wherever you can.
Not sure? Then hang the units on a continuous rail that you fix at multiple points, rather than each unit on two points. That spreads the load.
Step by step: fitting kitchen units
Step 1: assemble the carcasses (somewhere flat)
Put the carcasses together on a flat floor or across two trestles. Important: check for square by measuring the diagonals. If they differ by more than 2 millimetres, pull the unit true before you fix the back panel.
The back panel is what holds the unit square. Never leave it off and never half-nail it.
Do not do this yet: fitting doors and drawers. They go on once everything is standing, otherwise you spend the whole job working around them and damaging them.
Step 2: hang the wall units
Yes, wall units first. With no base units in the way you can stand square in front of them, lay your level on top and put a step stool down if you need to. It is the only order that makes sense.
- Fit the hanging rail on your marked line. Drill, plug and screw every 30 to 50 centimetres, and always at the start and the end.
- Check the rail with a long spirit level. Not a short one, because a short level on a 3 metre rail hands you an error of a centimetre.
- Hang the units, left to right or working out from the corner.
- Adjust each unit using the two adjusting screws in the cabinet hangers: one for height, one to pull the unit tight against the wall.
- Join the units together before you go any further (see below).
Working without a rail, using individual hanging brackets? Then use at least four fixing points per unit and screw a batten on your marked line to rest the units on temporarily. That saves you a third pair of hands.
Step 3: set the base units
- Start at the highest point of the floor or in the corner, whichever is the more decisive.
- Wind the adjustable legs to the height you want (87 centimetres to the top of the carcass, for example).
- Put the unit in place and check with the level: along the run and front to back. Everybody forgets that second one, and then your drawers tip forward.
- Slide the next unit up against it, level it to match, and join them.
- Work along the whole run like that, and re-check with the long level across the tops every three units.
Fix the base units to the wall too, with a bracket or a screw through the back panel into the wall. Not because the unit will fall over, but because a free-standing unit shifts every time you pull a drawer out.
Step 4: joining the units
Units that are not joined start to move about. The gaps between the doors go uneven and the worktop does not sit flat.
Here is how to do it properly:
- Pull two neighbouring units tight together with two clamps, one at the front and one at the back.
- Check that the front edges line up exactly and that the tops sit at the same height.
- Drill two or three holes through both side panels (pilot drill them!), top and bottom, about 5 centimetres in from the front.
- Fix them with cabinet connecting bolts or euro screws. Ordinary wood screws work too, but connecting bolts give you a neat, countersunk head.
Do this before you lay the worktop. After that you cannot get at it.
Step 5: fillers and trim panels
A kitchen rarely fits exactly. At the end of a run, or in a corner, you are left with a gap.
- Filler panels in the same colour as the fronts, cut to size.
- Cut them slightly full and plane them to fit, because a wall is never straight.
- Use a scribing tool or a pair of compasses to transfer the shape of the wall if it bows.
In a corner where two runs meet you usually need a filler of 5 to 10 centimetres, so the corner unit door can open without hitting the handle of the unit next to it.
Step 6: the worktop
This is the job where it all becomes visible.
- Measure in situ, not off the drawing. Measure at the front and at the back, because the wall is not straight.
- Cut with a fine-toothed blade and cut from the right side. With a circular saw you cut with the decorative face down, with a jigsaw with the decorative face up (or use a reverse-tooth blade). Mask the cut line with painter’s tape to stop it chipping.
- Seal the cut edges. On an HPL or laminate worktop with a chipboard core: edging strip or an edge trim, and seal the edge nearest the sink absolutely watertight. Water in the core means swelling, and that never comes right again.
- Cut-outs for the sink and hob: drill a start hole in the corners first, then cut with the jigsaw. Keep to the stated minimum distance from the front edge and from the wall.
- Fix the worktop from underneath with screws up through the top of the carcass, using a screw length that does not come through your worktop. Measure that.
- Seal the back edge against the wall, or fit a splashback.
With stone and composite: have it templated and cut for you. Cutting a sink aperture in granite with a hand-held jigsaw ends in a cracked slab, guaranteed.
Step 7: built-in appliances
Every manufacturer supplies an installation drawing. Follow that, not the “standard size” somebody quotes on a forum. Still, useful to know what is typical:
| Appliance | Typical aperture |
|---|---|
| 60 cm built-in oven | roughly 560 mm wide x 590 mm high |
| Combination microwave | roughly 560 mm wide x 450 mm high |
| 60 cm dishwasher | roughly 600 mm wide x 820 mm high |
| Fridge (aperture height) | 88, 102, 122 or 178 cm |
| 60 cm hob | cut-out roughly 560 x 490 mm |
Three things that often go wrong:
- Forgetting the ventilation. An oven and a fridge both need to get rid of their heat. Cut the ventilation openings shown on the drawing, even though you will not see them afterwards.
- Cables behind the appliance. There is almost never room. Route them into the unit next door.
- Extractor hood too low or too high. Keep at least 65 centimetres above a gas hob and around 55 to 60 centimetres above induction or ceramic, with a maximum of about 80 centimetres for it to work properly. Always work to the minimum figure in the manual. Source: Coolblue
Step 8: fitting and adjusting doors and drawers
Now, and not before. Clip the doors onto the hinges and the drawers into the runners.
Virtually all kitchen doors hang on cup hinges, and you adjust those in three directions:
| Direction | What it corrects | Which screw |
|---|---|---|
| Sideways (left/right) | uneven gap between two doors | the front screw on the hinge arm |
| Depth (in/out) | door stands proud or sits too far in | the rear screw |
| Height (up/down) | door sits too high or too low | the screws on the mounting plate on the carcass |
How to go about it:
- Close all the doors and step back. Look at the gaps, not at the doors.
- Sort the height first across the whole run, so all the bottom edges sit on one line.
- Then the sideways adjustment, so the gaps are the same width everywhere (aim for 2 to 3 millimetres).
- Then the depth, so all the fronts sit in one plane.
- Turn a quarter turn at a time and look again. Chipboard splits if you force it, and with a cordless driver on high speed you strip the thread in one second flat.
Take your time here. This is the step that makes the difference between “did it myself” and “who fitted that for you?”.
Step 9: plinths and finishing off
- Cut the plinth to size and clip it onto the legs with the clips supplied.
- Fit the plinth seal (the rubber strip along the bottom), so no water runs underneath.
- With a dishwasher: a drip tray, or at the very least a decent bead of sealant, because a dishwasher that drips eats your base units from the inside out.
- An under-cabinet light strip below the wall units for task lighting. It is the cheapest upgrade in your whole kitchen.
- Go round all the sealant joints: at the worktop, at the sink, at the hob.
The eight mistakes that give you a wonky kitchen
Have a look and see what you recognise. Here we go:
- Starting without finding the highest floor point. Then you cannot get the last unit up high enough.
- Fitting the base units first. After that you are stretching over your worktop to fiddle the wall units on, with a step stool that fits nowhere.
- Levelling the hanging rail with a short spirit level. Use a level of at least 1.20 metres, or a laser.
- Not joining the units. Uneven gaps, a worktop that rocks and drawers that catch.
- Only levelling along the run. Check front to back as well, or your drawers will tip.
- A socket directly behind a built-in appliance. The appliance then will not go into the aperture.
- Fitting the doors before you start. They are in the way, they get scratched, and you have to take them off again anyway.
- Not sealing the cut edge of a chipboard worktop at the sink. That is the number one cause of swollen worktops.
What does it cost and what do you save?
| Item | Range |
|---|---|
| Having the kitchen fitted (installation by the kitchen supplier) | €900 to €2,500 |
| Installation including altering water, electrics and waste | €1,500 to €4,000 |
| Cross-line laser hire | €20 to €50 per day |
| Spirit level, 1.20 to 2 metres | €30 to €80 |
| Plugs, screws and connecting bolts | €30 to €80 |
| Edging strip and sealant | €20 to €50 |
| Worktop templated and cut (composite/stone) | €250 to €900 |
So fitting it yourself saves you roughly €1,000 to €2,500 on an ordinary kitchen. Allow two to four days if you take it steady, more if there is ripping out and installation work to do as well.
What I would always put out to a professional:
- Connecting the gas (that is a job for a registered gas engineer, and not one you are allowed to do yourself).
- Running a new cooker circuit or high-power supply at the consumer unit.
- Templating and cutting a stone or composite worktop.
What you can happily do yourself: all the cabinetry, the laminate or HPL worktop, the plinths, hanging the extractor hood, plumbing the dishwasher into an existing connection.
Frequently asked questions
Do you hang the wall units or the base units first?
Wall units first. With no base units there you have clear access to the wall, you can stand square in front of it with a step stool, and you will not damage your new worktop. Do mark out your reference lines from the highest point of the floor first, though, because they decide where the rail goes.
How high do you hang kitchen wall units?
Usually 50 to 60 centimetres above the worktop. It is a compromise: higher gives you more room to work, lower is easier to reach. If you are short, head towards 50 centimetres. If an extractor hood is going in, that sets the height above the hob: at least 65 centimetres above gas and around 55 to 60 centimetres above induction.
What is the standard worktop height in a kitchen?
Roughly 90 to 92 centimetres, made up of a 72 centimetre carcass, legs of 10 to 15 centimetres and a worktop of 2 to 4 centimetres. But that standard suits somebody about 1.70 metres tall. Measure to your elbow and take off 10 to 15 centimetres for your ideal height.
Can I hang kitchen units on a plasterboard wall?
Yes, but not with ordinary plugs. Use heavy-duty cavity fixings (metal spring toggles) and find the metal or timber studs wherever you can. The best answer is timber backing: an 18 millimetre plywood board between the studs at the height of the hanging rail. If you cannot get to that any more, hang the units on a continuous rail with plenty of fixing points, so the load is spread.
How do I adjust kitchen doors so the gaps are even?
You adjust cup hinges in three directions: sideways with the front screw on the hinge arm, in depth with the rear screw, and in height with the screws on the mounting plate. Sort the height first across the whole run, then the sideways gaps (aim for 2 to 3 millimetres), then the depth. Turn a quarter turn at a time, because chipboard splits.
How long does it take to fit a kitchen yourself?
Allow two to four days for the cabinetry, the worktop and the finishing off on an ordinary kitchen of four to six metres. If the old kitchen has to come out first, and water, waste and electrics need moving, add another two to three days. Plan the door adjusting as a separate, unhurried evening.
What do I do if my floor is out of level?
Establish how far out it is, then decide. Up to about 1.5 centimetres of difference you can take up with the adjustable legs and a plinth you cut to fit. More than that and you get visibly sloping plinths and a gap under your tall units. Level the floor first in that case, or stand the kitchen on a strip of self-levelling compound that you pour flat beforehand.
The short version: start at the highest point of the floor, mark out your level reference lines before you drive a single screw, hang the wall units before the base units, check the units along the run and front to back, join every unit to its neighbour, pick a fixing that suits your wall type, and save the doors until the very last.
The real secret is not the tools. It is that half hour of measuring and marking out at the start, the half hour you think at the time you are going to skip. Do it anyway, and the rest follows on its own.
Want to take on more jobs like this around the house? At Fred’s DIY Plans I show you step by step how to tackle kitchens, bathrooms, walls and floors yourself, with the order of work, the sizes and the materials the pros use. Have a look here.
Best regards from Fred Schouten, builder and DIYer through and through
PS: before anything gets closed up, photograph your walls with a tape measure lying against them, so you can see exactly where the pipes and the wiring run. In three years you will want to add a socket or hang a shelf, and that photo will be worth more to you than the smartest kitchen. Small tip. Big difference.