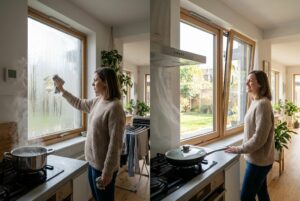
Installing mechanical ventilation comes down to two things in practice: an extract unit in the loft or in a cupboard that pulls stale air out of the kitchen, bathroom and toilet, and ducts running to those rooms. How much capacity you need follows from the Dutch building decree, the Besluit bouwwerken leefomgeving: at least 21 dm³/s (roughly 75 m³/h) for a kitchen with a hob, 14 dm³/s (about 50 m³/h) for a bathroom and 7 dm³/s (about 25 m³/h) for a toilet. For a normal family home that puts you at a unit of at least 150 m³/h, in practice 250 to 400 m³/h. Source: Informatiepunt Leefomgeving
What almost nobody tells you: an extract system only works if fresh air can get in somewhere. Put a stronger unit in a house you have just made airtight, with all the vents closed, and it pulls nothing. It only makes more noise and burns more electricity.
Everything is below: which system you actually have, how to work out in five minutes how much capacity your house needs, how to replace an old extract unit yourself, what you are allowed to do yourself on a new installation, how to balance the valves so each room gets what it should, what the 400 euro Dutch ISDE grant demands exactly (and why doing it yourself costs you that grant), and what the whole thing costs.
First things first: which system do you have?
There are four systems, labelled A to D in the Netherlands. Knowing which one you have determines everything else.
| System | Supply | Extract | Where you find it |
|---|---|---|---|
| A | vents | vents and chimney | homes up to roughly 1970 |
| B | mechanical | natural | rare |
| C | vents in the facade | mechanical, extract unit | by far the most common: built from about 1975 |
| D | mechanical | mechanical, with heat recovery | new build and renovation |
This article is about system C: classic mechanical extract with a central fan unit. That is the system hanging in millions of homes, often twenty years old or more, and where the most is to be gained.
Thinking of moving to system D with heat recovery? That is a different job, with different ducting and a different price tag. I have written a separate piece on that.
Recognise any of this? Then something is wrong
Have a quick look at what sounds familiar. Here we go:
- Steamed up bathroom windows that take an hour to clear.
- Black specks of mould in the grout above the shower or behind the wardrobe on the north wall.
- The unit is always on setting 3 and it does not help.
- You can hear the unit all through the house, but you feel no pull at the valve.
- A sheet of paper will not stick to the extract valve when you hold it underneath on the highest setting.
- Cooking smells are still hanging in the hallway the next morning.
- Clammy, stale air in the bedroom in the morning.
Point 5 is the best test you can do. Put the unit on the highest setting, hold half a sheet of kitchen roll against the valve in the bathroom or toilet and let go. Does it stay put? Then there is still suction. Does it drop straight away? Then your system is pulling next to nothing, and that is rarely down to the unit alone.
How much capacity does your house need?
You can work this out in five minutes. The requirements are in the Dutch building decree (Besluit bouwwerken leefomgeving, or Bbl).
For existing homes (article 3.67 Bbl, determined to NEN 8087):
| Room | Minimum capacity | Converted |
|---|---|---|
| Habitable room (living room, bedroom) | 0.7 dm³/s per m², at least 7 dm³/s | 2.5 m³/h per m² |
| Kitchen with a hob | 21 dm³/s | about 75 m³/h |
| Bathroom | 14 dm³/s | about 50 m³/h |
| Toilet | 7 dm³/s | about 25 m³/h |
Source: Informatiepunt Leefomgeving
For new build the requirements are higher: 0.9 dm³/s per m² for a habitable zone and 0.7 dm³/s per m² for a habitable room, determined to NEN 1087. The requirements for kitchen, bathroom and toilet are the same.
Do the sum with me, for an average terraced house:
- Kitchen: 75 m³/h
- Bathroom: 50 m³/h
- Downstairs toilet: 25 m³/h
- Upstairs toilet: 25 m³/h
Add them up: 175 m³/h of extract on the highest setting.
A 250 m³/h unit sits comfortably above that, because you always lose some in the ducts and bends. A 400 m³/h unit is nice if you have a utility room, a second bathroom or a large open plan kitchen.
Do not go wildly oversized. A unit that is too big and runs on its lowest setting delivers too little per valve, and on the highest setting it makes a racket. A well chosen unit of 250 to 300 m³/h with decent control beats a 500 m³/h unit that you never dare turn above setting 1.
The extract unit: what do you buy?
DC, always
This is the most important choice, and the reason replacing an old unit often simply pays for itself.
An old AC unit runs 24 hours a day, 365 days a year. A modern DC unit does the same work on far less electricity. In practice you end up at roughly 100 to 250 kWh a year for an old AC unit against about 50 to 150 kWh a year for a DC unit, depending on how hard it has to work. The difference is biggest on the lowest setting: an AC motor easily draws around 20 watts there, while a DC motor gets away with a few watts. Source: Duurzaam Bouwloket
Over a year that is roughly 25 to 75 euros of electricity. At a unit price of 300 to 600 euros that is no miraculous payback, but you do get a unit that is quieter, controls better, and gives you a reason to go through your whole installation once.
Control: switch, humidity or CO2
| Control | How it works | Who it suits |
|---|---|---|
| Multi-speed switch (wired) | you choose the setting | the classic system |
| Wireless switch (RF) | transmitter in bathroom and kitchen | when you cannot run a cable |
| Humidity sensor in the unit | steps up when you shower | bathroom, simple and effective |
| CO2 sensors in the rooms | steps up when the air goes stale | living room and bedrooms |
The humidity sensor solves the classic problem: someone showers, forgets to turn the setting back down, and the unit runs at full power for the rest of the day. Or worse, they never turn it up at all and the bathroom goes mouldy.
CO2 control goes a step further and measures how fresh the air is in the living spaces. That is comfort, and it is also the condition for the grant (see below).
Connections and diameters
Most units have four connections of 125 millimetres and a discharge of 125 or 150 millimetres. Some have 3 x 125 plus 1 x 150.
Do not reduce the diameter. Taking a duct from 125 millimetres down to 100 millimetres costs you more airflow than you think, because resistance climbs steeply as the diameter drops. If you have an old system with 100 millimetre ducting, that is a good reason to include those ducts in your plan.
Also check whether the unit discharges left or right and whether that suits your existing roof terminal. On many brands you can swap the connection side, so check that before you order.
Noise
The rule is clear: noise from a ventilation system in a habitable room must not exceed 30 dB(A). Source: Alpha Ventilatie
In practice, noise complaints rarely come from the unit itself and almost always from:
- A unit screwed rock hard onto a timber floor or a thin wall (structure borne noise).
- Too many bends and ducting that is too narrow, so the air has to whistle its way through.
- A valve that is closed down too far.
What can you do yourself?
Honest answer:
| Task | Do it yourself? |
|---|---|
| Removing the old unit | yes |
| Hanging the new unit and connecting it to existing ducts | yes |
| Running ducts and fitting valves | yes, but labour intensive |
| Fitting trickle vents in the facade | yes |
| Connecting to an existing socket | yes |
| Making a new circuit or a fixed connection | better not, or have it checked |
| Making or altering the roof terminal | only if you are comfortable on your roof |
| Balancing to the correct airflow rates | possible with a meter, usually better outsourced |
| An installation you want the ISDE grant for | no, that has to be done by an installation firm |
That last point is hard and fast, so I will deal with it separately.
The ISDE grant: 400 euros, but with conditions
Since 1 January 2026 you can get a Dutch ISDE grant for energy efficient ventilation. The amount is a one off 400 euros per home. Source: RVO
Three types qualify:
| Type | Requirements |
|---|---|
| Central CO2 controlled extract fan | capacity over 125 m³/h, at least 2 CO2 sensors |
| Central balanced ventilation with heat recovery | efficiency at least 85 percent, capacity at least 125 m³/h |
| Decentralised balanced ventilation with heat recovery | efficiency at least 80 percent, capacity at least 80 m³/h |
The conditions that stand out most:
- A humidity, movement or temperature sensor does not count. They have to be genuine CO2 sensors, at least two of them.
- You also have to take one or more insulation measures. Ventilation on its own gets you nothing.
- A (building) installation firm carries out the complete installation. You are allowed to install it yourself, but then there is no grant.
- The installation has to be carried out on or after 1 January 2026.
- The home was built before 1 January 2019, or the planning permission was applied for before 1 July 2018.
- You apply for the grant within 24 months of the insulation measure being installed.
Do the sums honestly. Replacing a unit yourself costs you roughly 300 to 600 euros in materials. Having it done costs 600 to 1,200 euros. The grant is 400 euros. Doing it yourself usually stays cheaper, unless you already have an installer in the house for the insulation anyway.
Replacing an extract unit: step by step
This is the most common job, and it is well within reach. Allow two to four hours.
Preparation
- Measure up the existing unit: how many connections, what diameter, where the discharge sits.
- Photograph the wiring and the duct layout before you undo anything. Seriously, this saves you half an hour of puzzling later.
- Look at how the unit hangs: on rubber anti vibration mounts, on a bracket, or loose on the floor.
- Check your power supply: an ordinary socket or a fixed connection.
Step 1: switch off the power
Pull the plug, or switch off the circuit at the consumer unit and check with a voltage tester. With a fixed connection: switch off the circuit, every time.
Step 2: disconnect the ducts
The ducts are usually held on the spigots with tape and a clamping band. Cut the tape and pull them off. If there is a flexible hose on there, take care not to tear it.
Mark every duct with tape and a marker pen. Kitchen, bathroom, downstairs toilet, upstairs toilet. Reconnecting them wrongly means your bathroom gets 25 m³/h and your toilet gets 75.
Step 3: take the unit off
Undo the mounting brackets, disconnect the wiring (photo!) and lift it away. Take a moment to judge the weight: some old units are heavy and sit in an awkward spot in the loft.
Step 4: look inside the ducts
While you are in there anyway: shine a torch into the ducts. Do you see a greasy layer of dust, or even a plug of it? Then cleaning will do more for you than a new unit.
Do this at the same time: take out all the extract valves, leave them to soak overnight in soapy water, rinse them off and put them back on exactly the same setting. Do not twist them, because that wrecks the balancing. Count the turns if you do have to turn them.
Step 5: hang the new unit
- Mount it free of vibration. Rubber mounts or a bracket with a rubber profile. Do not screw it straight onto a timber floor or a plasterboard wall, or you will hear it everywhere.
- As close to the roof terminal as possible, and with as few bends as you can manage.
- Accessible. You need to be able to get to it again in five years for maintenance. I have seen units disappear behind a boarded up loft knee wall. That is a present to your future self, and not the fun kind.
Step 6: connect the ducts
Pay close attention to what is intake and what is discharge. Swap those around and you blow the muck from your ducts straight into your house.
Slide the ducts onto the spigots and secure them with aluminium tape or a clamping band. Ordinary duct tape dries out and lets go after a few years.
Step 7: wire it up
Follow the diagram in the manual. Multi-speed switches work with a separate control wire per setting. Have you got old 4 core wiring and a new unit that controls differently? Then a wireless (RF) switch is often the easiest solution.
Step 8: test and balance
Switch the power back on, run through all the settings and check room by room with the paper test whether there is suction. For proper balancing, come back to the section further down.
Installing a new system: the ductwork
No mechanical ventilation yet, or laying everything from scratch? Then this is the approach.
Choosing your ducting
| Type | Advantage | Disadvantage |
|---|---|---|
| Spiral duct (steel) | smooth inside, low resistance, cleanable | less flexible, you buy the bends |
| Flexible aluminium hose | easy to route around obstacles | high resistance, collects dirt |
| Plastic (PVC) | light, smooth | sometimes static, needs good bracketing |
Choose spiral duct or smooth plastic for the main runs. Only use flexible for the last half metre to a valve, and keep it taut, because a flexible hose hanging like a concertina halves your airflow.
Design rules
- As short and as straight as possible. Every 90 degree bend costs you airflow. Two 45 degree bends are better than one 90.
- 125 millimetre diameter for the kitchen and the main branches; 100 millimetres is acceptable to a toilet on a short branch.
- No ducts through unheated spaces without insulation. In a cold loft, condensation forms inside the duct and drips back.
- Bracket every 1.5 to 2 metres. A duct left hanging will resonate.
- Valves not directly above the shower, but definitely in the bathroom, and preferably as far from the door as possible, so the air is drawn across the room.
- No kitchen valve inside the cooker hood. A recirculating hood and an extract valve in the ceiling work together. Connecting a powered extractor hood to your ventilation duct is not allowed, because it fills your entire system with grease.
The roof terminal
The discharge goes outside through a roof terminal. On an existing installation it is already there. On a new one:
- Use an insulated roof terminal, otherwise you get condensation.
- Keep your distance from roof windows, air vents and the chimney.
- Leave the flashing or the tile terminal to someone who does roof work if you are in any doubt. A leaking roof costs more than the entire ventilation system.
The forgotten half: where does the fresh air come in?
This is where it goes wrong in nine cases out of ten, and it is exactly why people buy a bigger unit that then solves nothing.
A mechanical extract system is a negative pressure system. You pull air out of the wet rooms, and that air has to come from somewhere. If it cannot come from anywhere, nothing happens. Your motor runs, your meter runs, and the air stands still.
Where the fresh air is supposed to come in:
- Trickle vents above the windows in the living room and bedrooms. Open them. Yes, in winter too.
- Top hung vent windows if there are no trickle vents.
- Self regulating vents that close down by themselves in strong wind, so you do not get a draught.
And then the airflow through the house:
Air coming into the bedroom has to be able to reach the bathroom. That happens through the gap under the door. A gap of about 1.5 to 2 centimetres is a common rule of thumb in practice. Do you have thick carpet everywhere, or a threshold under the bathroom door? Then your whole system is choked.
Solutions: trim a little off the bottom of the door, fit a transfer grille in the door, or cut a slot in the threshold.
Practical test: put the unit on the highest setting, close all windows and vents and hold paper up to the bathroom valve. Then open a window slightly and repeat. Notice a clear difference? Then your air supply is the bottleneck, not your unit.
Balancing: the difference between working and just running
A system that has not been balanced pulls the most from wherever the resistance is lowest. That is usually the toilet right next to the unit, and not the bathroom at the end of the longest duct run.
How it should be done: an installer first sets the total airflow at the unit and then distributes it room by room by opening or closing the valves, measuring the airflow at each valve with an airflow meter as they go. Source: Feenstra
A proper airflow meter costs a few hundred euros, and you do not buy one for a single job. Have the balancing done if you are installing a new system or if the complaints persist. Allow about 100 to 250 euros, and ask for a commissioning report.
What you can do yourself:
- Open all the valves fully first.
- Close the nearest valves (usually the toilet) a few turns, so more air goes to the furthest valve.
- Test with the paper method in every room on the highest setting.
- Do the mirror test in the bathroom: take a normal shower with the unit on the highest setting. Is your mirror clear again around ten to fifteen minutes after showering, with the door shut? Then you are heading in the right direction.
- Mark the final position of every valve with a marker on the stem, so cleaning it later does not ruin your setting.
This is no substitute for a real measurement. But it is infinitely better than leaving every valve at the factory setting.
Maintenance: the cheapest return there is
| What | How often | Do it yourself? |
|---|---|---|
| Cleaning the extract valves | 2 to 4 times a year | yes |
| Cleaning the trickle vents | 1 to 2 times a year | yes |
| Dusting the fan impeller in the unit | annually | yes, power off |
| Having the ducts cleaned | every 4 to 5 years | no |
| Having the unit serviced | every 2 years | no |
Duct cleaning is done with rotating brushes and negative pressure. Allow roughly 100 to 300 euros for a house. Source: Werkspot
The valves are where the biggest gain is. A silted up bathroom valve can halve your airflow without you noticing, because the noise from the unit stays exactly the same. Twenty minutes in soapy water twice a year is all it takes.
Remember the setting. Do not simply unscrew the valve off its stem. Count the turns, or mark it with a pen.
What does it cost?
| Item | Range |
|---|---|
| DC extract unit 250 to 400 m³/h | 300 to 700 euros |
| Unit with CO2 control and sensors | 500 to 1,000 euros |
| Wireless multi-speed switch | 40 to 100 euros |
| Extract valve | 10 to 30 euros each |
| Spiral duct 125 mm | 8 to 15 euros per metre |
| Bend or T piece | 8 to 20 euros each |
| Insulated roof terminal | 80 to 200 euros |
| Trickle vent (self regulating) | 60 to 200 euros each |
| Having the unit replaced by an installer | 600 to 1,200 euros |
| Having a complete new system C installed | 2,000 to 4,500 euros |
| Balancing with a report | 100 to 250 euros |
| Having the ducts cleaned | 100 to 300 euros |
| ISDE ventilation grant (installation by a firm) | 400 euros |
The eight mistakes that wreck your ventilation
Here we go:
- Closing the vents because of the draught. Then your unit pulls air from your crawl space, from your chimney and past your window frames. Exactly the air you do not want. Go for self regulating vents instead.
- Swapping intake and discharge when replacing the unit. You then blow dust into your house for years.
- Screwing the unit hard onto a timber floor. Vibration becomes noise, and then you never turn it up again.
- Reducing ducts from 125 to 100 millimetres. Resistance climbs steeply and your airflow collapses.
- Hanging flexible hose like a concertina. Every fold costs you air.
- Cleaning the valves and turning them back at random. That throws away a balance you cannot restore yourself.
- Connecting a powered cooker hood to the ventilation duct. Grease in your ducts, and you will never get it out again.
- Only buying a bigger unit when you have damp complaints. Look at the ducts, valves and air supply first. Nine times out of ten that is where it is.
Frequently asked questions
Can I replace my extract unit myself?
Yes. There is no legal obligation to bring in an approved installer for an extract fan unit. What does apply: connect it properly according to the manual, work on a dead circuit if it has a fixed connection, and make sure you do not swap intake and discharge. If you want the 400 euro ISDE grant, a (building) installation firm has to carry out the complete installation.
How many m³/h does my extract unit need to handle?
Add up the requirements for your wet rooms: about 75 m³/h for a kitchen with a hob, 50 m³/h for a bathroom and 25 m³/h per toilet. An average terraced house lands at around 175 m³/h. Then choose a unit of 250 to 300 m³/h, so you have margin for duct resistance.
Why is my mechanical ventilation extracting so badly?
Usually it is not the motor. The four usual causes: silted up extract valves, dirty or kinked ducts, closed trickle vents so no air can get in at all, and thresholds or thick carpet blocking the airflow under the doors. Start by cleaning the valves and opening the vents, which costs you nothing.
What does mechanical ventilation cost in electricity?
An old AC unit running day and night quickly reaches roughly 100 to 250 kWh a year. A modern DC unit often does the same work on half of that or less. Reckon on a saving of roughly 25 to 75 euros a year, depending on how hard your unit has to work and on your electricity tariff.
Should I leave the ventilation on at night and in winter?
Yes. Ventilation is not a luxury but a basic necessity, and in winter especially the difference between indoor and outdoor air is large, so moisture condenses faster on cold spots. Set the unit to its lowest continuous setting and step it up while showering and cooking. Switching it off to save money earns you a few euros and costs you mould.
What is the difference between mechanical ventilation and heat recovery?
With mechanical extract (system C) you pull stale air out and fresh air comes in through vents. The heat in the extracted air is lost. With balanced ventilation with heat recovery (system D) a unit also blows fresh air in, recovering the heat from the extract air as it does so, at efficiencies above 85 percent. System D is more comfortable and more economical, but it demands a completely doubled duct network.
How often should I have my ventilation ducts cleaned?
The common guideline is every four to five years. You clean the valves yourself two to four times a year, and you have the unit serviced about every two years. If you live in a house where nothing has ever been done to it, a first clean is often the cheapest improvement you can make.
In short: work out how much capacity your house needs (kitchen 75, bathroom 50, toilet 25 m³/h), choose a DC unit with a bit of margin, hang it free of vibration, keep your ducts short, straight and at 125 millimetres, make sure fresh air actually can get in through vents and gaps under the doors, and have the whole lot balanced.
And do that paper test at your valves. It is thirty seconds of work, and it tells you more about your ventilation than the noise of the motor ever will.
Want to get your house warm and dry without your energy bill climbing? In the Energie Verpulveraar we set out step by step how to line up insulation, draught proofing and ventilation, which order gets you the most, and where your heat is really leaking away right now. Have a look here.
Cheers, Fred Schouten, builder and DIYer through and through
PS: hang a cheap hygrometer in your bathroom and one in your bedroom. If it sits above 70 percent for days after showering, you know enough and you do not have to guess. If you are under 60 percent in winter, your system is doing its job just fine. Small tip. Big difference.