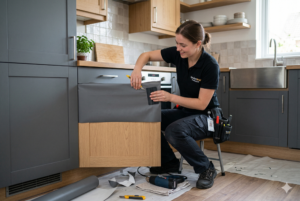
You build an insulated window shutter like a sandwich: two thin sheets of plywood or MDF with a 20 to 30 mm PIR insulation core between them, cut to fit the clear opening of the frame, with draught seal all the way round and magnets or turn buttons to hold it in place. Measured in a research lab, well-fitting timber shutters roughly halve the heat loss through a single-glazed window, and in real-world measurements a window with insulated shutters went from a U-value of 5.5 to 2.2 W/m²K. That is the jump from single glazing to double glazing, without touching your frame.
And now the sentence that really matters: the insulation thickness does not determine your result, the edge seal does. A shutter with 30 mm of PIR and a 5 mm gap all round performs worse than a 15 mm one that closes neatly everywhere. Heat does not go through, heat goes round.
This article is for anyone with single glazing, old double glazing, a listed building where you are not allowed to replace the glass, a rented home where you cannot touch the frame, or simply a north-facing room that never warms up in the evening. Below: what shutters really deliver, how to build them, how to prevent condensation behind them and what you get back.
What do shutters really deliver? The numbers
This is exactly where most articles on the subject fall down: they mention that shutters insulate, but not how much. It has been measured. Glasgow Caledonian University carried out comparative testing in a climate chamber on single-glazed sash windows, commissioned by Historic Scotland:
| Measure | Reduction in heat loss through the window |
|---|---|
| Modern curtains with thermal lining | 14% |
| Modern roller blind | 22% |
| Victorian roller blind | 28% |
| Honeycomb or cellular blind (double layer) | 36% |
| Roller blind with low-emissivity film | 45% |
| Timber shutters (traditional, well fitting) | 51% |
| Purpose-designed insulated shutter panels | Around 60% |
| Correctly fitted secondary glazing | 63% |
English Heritage recorded reductions of up to 64% for well-fitting timber shutters. Source: Designing Buildings
And the most convincing figure does not come from a lab but from occupied housing: at homes belonging to the Lister Housing Co-operative in Edinburgh, the original shutters were upgraded with insulation, and the U-value of the window dropped from 5.5 to 2.2 W/m²K. Source: Building Conservation
To put that in perspective: 5.5 W/m²K is an ordinary single-glazed window. 2.2 W/m²K is roughly the value of standard double glazing. So with a shutter you close in the evening, you get the insulation value of double glazing out of a single-glazed window at night. During the day the window is just a window again.
Note what this does not say. You are not saving 51% on your energy bill. You are reducing the heat loss through that one window by about half, during the hours the shutter is closed. Further down I convert that into money, and it turns out to be a fair sum, but no miracle cure.
Why a shutter works better than a curtain
Three reasons, and they explain every design choice further down.
1. Still air between shutter and glass. A closed shutter traps a layer of air between the panel and the glass. Still air is an excellent insulator; moving air is not. A curtain that hangs open at the top and bottom lets the air circulate: warm room air goes in over the top, cools against the glass, drops down and comes back into the room along the bottom. That is exactly why you still have cold feet with the curtains drawn.
2. A rigid, closed panel. A shutter is a board. It does not hang loose, it does not fold, it does not billow. That means you can get it to close neatly everywhere, and that is the difference between 14% (curtain) and 51% (shutter).
3. You can put insulation inside it. A curtain is fabric. In a shutter you can build in 25 mm of PIR, and that is a completely different order of insulation value.
And the point that often gets forgotten: a shutter also does something about radiant cold. In winter, a single-glazed window is a large cold surface that draws heat away from your body by radiation. It feels like draught, even when there is none. Put a shutter in front of it and that radiant cold is gone. Plenty of people then turn the thermostat down a degree without noticing, and that is another rough 6% off the heating bill.
Interior or exterior shutters?
| Interior shutter | Exterior shutter | |
|---|---|---|
| Insulation in winter | Better: the shutter sits inside the thermal envelope | Less: there is a cold zone between shutter and glass |
| Keeping heat out in summer | Moderate: the sun is already through the glass | Much better: keeps the heat outside |
| Condensation risk | Present, and you have to deal with it | Barely any indoors |
| Weather and maintenance | No weather exposure, lasts forever | Rain, UV, frost: maintenance every few years |
| Security | None | Yes, with sturdy shutters |
| Consent | None, and in most cases not even on a listed building | Needs care: façade appearance, listing, conservation area |
| Ease of use | From inside, always | Leaning out, or you need a mechanism |
Source: Toolkit Duurzaam Erfgoed Source: Designing Buildings
The short conclusion: if you want to keep heat in during winter, build interior shutters. If you want to keep heat out in summer, they really have to go outside. Once the sun is through the glass, the heat is in the room, and an interior shutter barely helps any more.
If you are in a listed building or a conservation area, interior shutters are almost always the safest route. Exterior shutters change the appearance of the façade, and on a listed building that needs consent. Were there shutters once, and can you still see the pintles or the rebates in the façade? Then putting them back makes a lot of sense, but discuss it with your local planning authority first.
The problem almost nobody mentions: condensation behind the shutter
This is the most important warning in this article, and the reason some people take their beautiful homemade shutters back down after one winter.
Put a well-insulating shutter in front of a single-glazed window and that glass gets even colder than it already was. The heat from the room no longer reaches it. A cold transition zone forms between shutter and glass. Add damp room air to that and it settles out as condensation on the glass, and in the worst case it runs into the sill. Source: Toolkit Duurzaam Erfgoed
Four things that solve this, in order of importance:
1. Seal the edges really well, on the room side. This sounds counter-intuitive: you would think “just let it breathe”. But the problem is not the air behind the shutter, it is the damp room air that keeps arriving. Seal the shutter airtight and there is a limited amount of air behind it that gives up its moisture once and then reaches equilibrium. Seal it sloppily and the room pumps fresh moisture into that cold zone all night.
2. Keep the humidity in the room low. Below around 55 per cent relative humidity, condensation on single glazing becomes a good deal less likely. Put up a hygrometer. Ventilate, including (especially) in winter. Do not dry washing in the room.
3. Check every morning for the first few weeks. Open the shutter, look for water on the glass or the sill, wipe it away. If you are still seeing water consistently after a few weeks, there is a leak in your edge seal or your humidity is too high.
4. Make sure the sill can cope with water. If there is unprotected timber or MDF on your windowsill, paint it properly or lay a strip of aluminium or plastic on it. Water standing on a timber sill is the start of rot.
Ideally do not fit these shutters in a bathroom or kitchen without good extraction, because the moisture load there is too high. In a bedroom they work fine, but leave the ventilation grille open.
Which type of shutter are you going to make?
| Type | How it works | Advantage | Drawback |
|---|---|---|---|
| Loose insert panel | Panel you wedge into the reveal or fix with magnets | Simplest to build, best seal, no hinges | You have to put it somewhere during the day |
| Hinged shutter (one or two leaves) | On hinges against the reveal, folds back against the wall | Always to hand, looks good on display | Takes up wall space, harder to make airtight |
| Folding shutter (concertina) | Two or three narrow leaves that fold against each other | Suits a wide window, folds away compactly | More hinges, more joints |
| Sliding shutter | Slides along a track in front of the window | Modern, no swinging leaves | Track is visible, seals less well down the sides |
| Top-hinged flap above the window | Swings upwards and hangs on a hook | Stays out of sight and out of the way | Awkward to operate on tall windows |
My advice if you are starting out: build a single loose insert panel for your coldest window first. It is half a day’s work, it costs you ten or twenty euros in materials, and after one winter you know exactly whether this works for your house and whether you want more of them. If you then move on to the hinged version, you already know where the sticking points are.
An insert panel has one more big advantage: it seals better than any hinged shutter. You simply press it into the opening against the draught seal, right round the perimeter. With a hinged shutter you always have a joint on the hinge side.
The build-up: which insulation, how thick?
At heart, a shutter is a sandwich panel. Here are a few build-ups with the theoretical insulation value at the centre of the panel, for a single-glazed window.
| Shutter build-up | Theoretical U-value of window with shutter closed | Total thickness | Weight per m² |
|---|---|---|---|
| No shutter (single glazing) | Around 5.5 to 5.7 W/m²K | ||
| 18 mm plywood, no insulation | Around 2.1 W/m²K | 18 mm | Around 9 kg |
| 6 mm plywood + 20 mm PIR + 6 mm plywood | Around 0.8 W/m²K | 32 mm | Around 5 kg |
| 6 mm plywood + 30 mm PIR + 6 mm plywood | Around 0.6 W/m²K | 42 mm | Around 6 kg |
| 6 mm plywood + 25 mm wood fibre or cork | Around 1.3 W/m²K | 31 mm | Around 8 kg |
(Calculated with an air gap of around 20 to 40 mm between shutter and glass and the usual surface resistances. λ values: PIR around 0.022, plywood around 0.15, wood fibre around 0.040 W/m·K.)
Read this table with a healthy dose of realism. These are the values at the centre of the panel, in a perfect world. In practice you see measurements around 2.2 W/m²K, and that difference is almost entirely down to the edges. Hence the main rule from the introduction: thicker insulation gains you little once you are above 20 to 25 mm of PIR; better sealing always gains you something.
Material choice in short:
- PIR (or PUR): highest insulation value per centimetre, light, rigid. The logical choice. Downside: combustible, and you have to close the edges properly.
- XPS: insulates slightly less well than PIR, but absorbs no water. A good choice where condensation is a risk, for example on the bottom 10 cm of the panel.
- EPS (expanded polystyrene): cheap, works fine, needs to be a bit thicker. Fragile when you cut it.
- Cork or wood fibre: bio-based, considerably heavier and thicker for the same effect. Choose this if the material matters more to you than the last few per cent.
- Reflective foil or bubble film: too thin as your only insulation, but as an extra layer on the window side it helps against radiant loss. It only works if there is an air gap next to it; stick it down tight and the reflection does nothing.
For the facings: 4 to 6 mm plywood (poplar or birch) is light, rigid and takes a neat finish. Six millimetre MDF also works, but it absorbs moisture: only use it if you paint it completely and keep it out of damp rooms.
Sizing and edge sealing: this is where you win
Measuring up
Measure the clear opening of the frame (the free opening, rebate to rebate) at three heights and three widths. Take the smallest measurement. From that, subtract:
- 3 mm on each side if you are using draught seal that compresses about 5 mm.
- 1 to 2 mm extra if your panel is going to be painted or lacquered.
Also check for square with a large square, and measure the diagonals. If they differ by more than 3 mm, make a template from card or hardboard and trace it onto your sheet. With old frames that is the rule rather than the exception.
Watch the obstacles in the opening: the window handle or espagnolette, the keeps, the hinges of a tilt-and-turn window. Your panel has to get past or around them. Measure them in and cut a recess, or make your panel slightly less deep so it sits in front of them.
The draught seal
This is the component that makes or breaks your result. Three options:
| Seal | Where | Strength |
|---|---|---|
| Self-adhesive EPDM or rubber profile (P or E profile) | Right round the panel, on the face that meets the frame | Stays elastic, lasts for years |
| Foam tape (PE or PU) | Right round, for larger or uneven gaps | Cheap, compresses a long way, but springs back less after a few years |
| Brush strip | Bottom edge of a sliding shutter | Allows sliding |
Stick the seal on the shutter, not on the frame. That way you can always trim or adjust the shutter later without damaging your frame, and the seal does not wear itself out against the frame.
Choose the thickness based on the gap you measured: with the shutter closed, the seal should be compressed by roughly 30 to 50 per cent. If it squashes completely flat, it is too thin or your panel is too big. If it barely makes contact, it is doing nothing.
The edges are where the heat escapes. After fitting, run a lighter or a small candle round the perimeter of the closed shutter and watch whether the flame moves. If it moves, you have a leak. Do this carefully, of course, and not on a shutter with fresh paint on it.
Step by step: making an insulated insert shutter
Allow half a day per shutter for the first one, and two to three hours for the ones after that.
Step 1: cut the facings to size
Cut two sheets of 4 to 6 mm plywood to the size you worked out. Use a circular saw with a guide rail or a plunge saw for a dead straight edge; you will not get that crisp enough with a jigsaw.
Cut both sheets at once (clamped together) and they are guaranteed identical.
Step 2: the insulation core
Cut the PIR board 5 mm smaller all round than your plywood facings, so you are left with a margin right round. Into that margin you glue a strip of timber or rigid foam, so the edge of your panel is closed and does not collapse when you pick it up.
PIR cuts most neatly with a fine-toothed handsaw or a long knife run against a guide. Insulation dust is an irritant: do it outside, wearing a dust mask.
Smarter alternative: use a ready-made sandwich panel or a PIR board with an aluminium facing, and bond your finish sheet to the room side only. That saves a layer, and the aluminium foil on the window side reflects radiant heat back into the room.
Step 3: bonding
Use an adhesive suitable for PIR (not every construction adhesive or PU glue is; some solvent-based adhesives attack foam). Water-based contact adhesive, D3 wood glue or an MS polymer adhesive all work well.
Apply the adhesive in beads, lay the sheet on top and weight the whole thing down over its full area with whatever you have in the house: books, tins of paint, a board with weights on it. Leave it at least 4 hours, preferably overnight.
Note: the whole thing has to cure dead flat. You will never get a slightly bowed sandwich straight again, and a bowed shutter does not seal.
Step 4: finishing the edges
Sand the edges flat with a sanding block. Finish the exposed edges with a thin lipping, timber edge banding or a strip of plywood. Beyond looking neater, that is functional too: a closed edge protects the foam and gives the draught seal a decent surface to bond to.
Ease the corners and edges slightly, and the paint holds better and you will not damage your frame when you fit the panel.
Step 5: choosing the fixing
For a loose insert panel:
- Neodymium magnets recessed into the panel, with a small steel plate or a stainless screw on the frame. This is the neatest solution: invisible, quick, and the panel pulls itself against the draught seal. Allow four to six 10 to 15 mm magnets for a 1 m² panel.
- Turn buttons or catch plates on the frame: cheap and simple, but visible.
- A tight friction fit: if your panel is slightly generous, it wedges itself in. It works, but with a timber frame that moves with the seasons it will be too tight one month and too loose the next.
For a hinged shutter: use ordinary butt hinges or a piano hinge over the full height. A piano hinge seals better and spreads the weight, which makes a difference with a shutter of a few kilos.
Do not forget a handle or a finger recess so you can get the panel out. A routed grip, a leather loop or a simple knob. Without one you end up picking at the edge with your fingernails.
Step 6: fitting the draught seal
Degrease the edge with methylated spirits, let it dry, and stick the draught seal on in one continuous run all the way round. Mitre the corners or let the seal run through the corner: a break at the corner is exactly where the air gets through.
Fit the shutter and check that it presses home everywhere. Where it does not, add a second layer of seal or adjust the size.
Step 7: finishing
Primer and two coats of paint on the room side. Do not forget the edges and the back: a panel finished on one side and bare on the other will warp.
On the window side you can leave the aluminium facing as it is, or use a light colour: the lighter and more reflective it is, the more radiant heat goes back into the room.
A nice bonus: you now have a large, flat panel in your room. Paint it the same colour as the wall and it disappears. Or make something of it: a cork pinboard, a mirror, a painting, or chalkboard paint so the kids can draw on it.
Step 8: storage
The biggest practical pitfall with loose panels: where do you put them during the day? Think about that before you build. Behind the sofa, in a slot behind the curtain box, flat behind a cupboard door, or simply against the wall next to the window with a small clip. Panels that have nowhere to live stop getting closed after a fortnight.
What does it deliver?
Let us do the honest sums, on an example window.
Assumptions: a single-glazed window of 4 m². U-value without shutter 5.5 W/m²K, with a well-insulating shutter 2.2 W/m²K (the measured real-world figure from Edinburgh). Average temperature difference between inside and outside over the heating season: 12 degrees. Shutter closed: 12 hours a day, for 150 days.
- Heat loss without shutter: 4 x 5.5 x 12 = 264 watts
- Heat loss with shutter: 4 x 2.2 x 12 = 106 watts
- Saving: 158 watts, over 12 hours x 150 days = around 285 kWh of heat per heating season
- Converted to gas (around 8.8 kWh of useful heat per m³ with a condensing boiler): roughly 32 m³ of gas a year
At a gas price of €1.20 to €1.50 per m³ (check your own annual statement), that comes to roughly €40 to €50 a year for this one window.
Material costs for 4 m² of homemade shutters run at around €40 to €80 per m², so €160 to €320. Payback time: roughly 4 to 8 years. Plus the comfort, which you feel straight away.
Important nuances:
- Do you have modern low-E double glazing? Then the effect is far smaller. You would be going from around 1.1 to maybe 0.7 W/m²K, and the saving drops to a few tens of euros for your whole house. On modern double glazing, shutters are mainly a comfort and blackout measure, not an energy measure.
- Do you have single glazing or old double glazing from before 1990? Then this is one of the cheapest measures there is, per kilowatt hour saved.
- Can you simply replace the glass? Then do that. Low-E double glazing or secondary glazing is structurally better than a shutter you have to close every evening. Shutters are the answer for situations where replacing is not possible or not allowed.
- The saving scales with the number of windows. Six windows of 2 m² with single glazing will easily deliver €100 to €150 a year between them.
When shutters are not the right choice
Let me be honest: skip this project if:
- You have not done any draught-proofing yet. The weakest link in old windows is almost always the gap between the opening light and the frame, not the glass. Source: Toolkit Duurzaam Erfgoed Draught seal around the opening parts costs €20 and an hour of your time, and often delivers more than a shutter. Do that first.
- Your roof, floor or walls are not insulated at all yet. There is far more surface area there and so far more heat loss. Windows come later in the queue.
- The window is an escape route. In a bedroom you need to be able to get out in a fire. A panel that jams or is held in with screws does not belong there.
- You do not have the discipline to close them every evening. Be honest. A shutter that never gets closed saves nothing. If that is not going to work for you, look at honeycomb or cellular blinds with side channels: they achieve around 36% and you pull them shut in two seconds.
The eight mistakes you want to avoid
- Too much attention on insulation thickness, too little on the edges. Above 25 mm of PIR you gain almost nothing; good draught seal always gains you something.
- Making the panel too tight or too generous. Measure in three places, take the smallest figure, subtract the compression of your draught seal.
- An asymmetrical sandwich. Insulation on one side and board on the other will warp. Build it symmetrically, or give both faces the same finish.
- Leaving the edges open. The foam gets damaged, the panel collapses and your draught seal bonds badly.
- The wrong adhesive on PIR. Some solvent-based adhesives attack foam. Use an adhesive suitable for insulation foam.
- Ignoring condensation. Check every morning for the first few weeks and keep your humidity below 55 per cent.
- Only finishing the room side. An unfinished back absorbs moisture and pulls the panel out of true.
- Not planning where the panels go during the day. That is why three in four homemade insert shutters end up in the loft after a month.
Frequently asked questions
How much heat loss do window shutters really save?
Well-fitting timber shutters reduce heat loss through a single-glazed window by around 51%, and purpose-designed insulated shutter panels reach around 60%. In a real-world measurement, the U-value of the window dropped from 5.5 to 2.2 W/m²K, so from single glazing to the value of standard double glazing. That only applies during the hours the shutter is closed, and it is not the same as 51% off your energy bill.
Which insulation do I use in a window shutter?
PIR insulation of 20 to 30 mm is the logical choice: highest value per centimetre, light and rigid. XPS is a good alternative in places where condensation can occur, because it absorbs no water. EPS also works but needs to be thicker. Cork or wood fibre is bio-based but considerably heavier and thicker. Above around 25 mm, extra thickness gains you little: at that point the edge seal determines your result.
Will I get condensation behind an insulated shutter?
You might, and it is the single most important thing to watch. The glass behind a shutter gets even colder than it already was, so damp room air that reaches it settles out as condensation. That is exactly why you should seal the edges of the shutter very well on the room side, keep the humidity in the room below around 55 per cent, ventilate in winter too, and check every morning for the first few weeks whether there is water on the glass or the sill.
Are interior or exterior shutters better?
For keeping heat in during winter, interior shutters are better: they sit inside your home’s thermal envelope. For keeping heat out in summer they really have to go outside, because once the sun is through the glass the heat is in the room. Interior shutters also have no weather exposure, last longer, and can usually be fitted without consent even on a listed building. Exterior shutters change the appearance of the façade, and on a listed building that needs consent.
What does it cost to make insulated window shutters yourself?
Allow around €40 to €80 per square metre in materials: thin plywood, PIR insulation, adhesive, draught seal, magnets and paint. So for a 2 m² window you are looking at roughly €80 to €160. On a single-glazed window you get that back in roughly four to eight years, plus the comfort you feel from the very first evening.
Do window shutters work with modern double glazing?
Hardly at all as an energy measure. Low-E double glazing already has a U-value of around 1.1 W/m²K, so the gain from a shutter is small and the payback time gets long. With modern double glazing, shutters are mainly of interest for blackout, sound and keeping summer heat out (and then on the outside). With single glazing or double glazing from before 1990, the effect is large.
Can I make shutters without drilling into the frame?
Yes, and that is precisely why loose insert panels are so popular in rented homes and listed buildings. A panel cut to wedge into the reveal with draught seal around it holds itself in place. If you want more certainty, use magnets and stick the metal keeper plate to the frame with double-sided mounting tape instead of screwing it. No holes, no damage, and completely reversible when you move out.
What works better: shutters or heavy curtains?
Shutters, by a wide margin. In comparative testing, modern curtains with thermal lining reduced heat loss by around 14%, while well-fitting timber shutters came out at around 51%. The difference is in the edges: a curtain hangs open at the top and the bottom, so room air keeps circulating past the cold glass. If you do want to go with curtains, choose honeycomb or cellular blinds with side channels: those achieved around 36%.
Insulated shutters are the kind of measure that only really pays off when you use them in the right place, after draught-proofing and with the rest of your house tackled in the right order. Want to know exactly where the biggest saving is hiding in your home, and in what order to tackle insulation, ventilation and heating? We explain it step by step in the Energie-Verpulveraar.